How to Test and Calibrate Your Gaming Controller on Windows
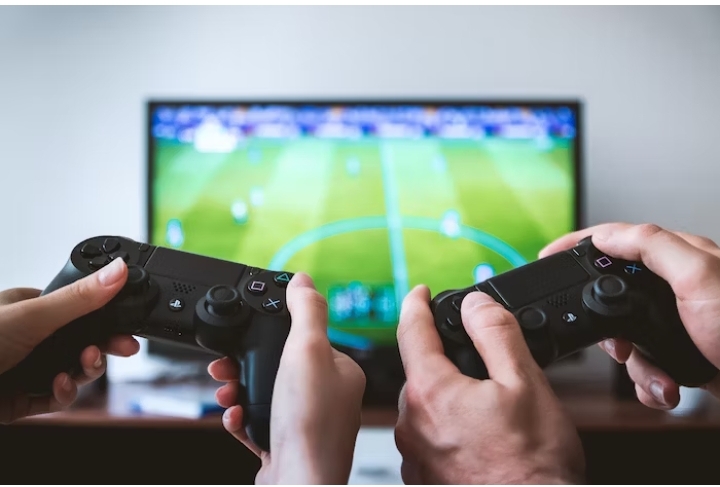
If you’re a dedicated PC gamer who spends a lot of time Playing games, you should set aside some time to test and calibrate your gaming controller. This will allow you to gain more exact control, reduce input lag, and address any performance issues.
In this article, we’ll walk you through the processes for testing and calibrating your gaming controller on Windows.
Why Test and Calibrate Your Gaming Controller?
Testing and calibrating your gaming controller can address various issues that may arise during gameplay. By performing these tasks, you can:
- Ensure proper functionality of all buttons and inputs.
- Enhance responsiveness and reduce input lag.
- Adjust sensitivity settings to match your preferences.
- Resolve issues like stick drift, where the analog sticks register movement even when untouched.
- Customize button mapping and controller configurations to suit your playstyle.
System Requirements for Testing and Calibration
Before diving into the testing and calibration process, ensure that your system meets the following requirements:
- A Windows PC with an available USB port
- A compatible gaming controller (e.g., Xbox, PlayStation, or third-party controllers)
- The latest drivers and software for your controller (available from the manufacturer’s website)
How to Test Your Gaming Controller on Windows
Here’s a quick guide on how to test your gaming controller on Windows:
Connect the controller: First, make sure your gaming controller is properly connected to your Windows PC. If it’s a wired controller, plug it into an available USB port. If it’s a wireless controller, follow the manufacturer’s instructions to pair it with your PC via Bluetooth or a wireless receiver.
Open the Control Panel: Click on the “Start” button on your Windows desktop and type “Control Panel” in the search bar. Open the Control Panel from the search results.
Access the Game Controllers settings: In the Control Panel, search for “Game Controllers” or “Devices and Printers.” Click on the corresponding option to open the Game Controllers settings.
Check for the controller: In the Game Controllers settings window, you should see a list of connected controllers. Look for your gaming controller in the list. If it’s properly connected, it should be displayed with its correct name.
Test the controller: Select your gaming controller from the list and click on the “Properties” or “Test” button. A new window will open, showing the properties and buttons of your controller.
Test the buttons and analog sticks: In the properties window, you can test the functionality of each button and analog stick on your controller. Press each button and move the analog sticks to see if they register correctly on the screen.
Calibrate the controller (optional): If you notice any issues with the controller’s responsiveness or if the analog sticks are not centered when at rest, you may need to calibrate your controller. In the properties window, there should be a “Calibrate” button. Click on it and follow the on-screen instructions to calibrate your controller.
Confirm functionality: After testing all the buttons and analog sticks, make sure they are functioning correctly and providing the expected inputs on the screen. If you encounter any issues or the controller doesn’t work as intended, you may need to troubleshoot or update your controller’s drivers.
Read Also: How to Fix the Screen Going Black While Gaming on Windows
How to Calibrate Your Gaming Controller Using the Control Panel
Here’s a quick guide on how to calibrate your gaming controller using the Control Panel:
Connect your controller: Start by connecting your gaming controller to your computer using a USB cable or via Bluetooth, depending on the type of controller you have. Make sure it’s properly connected and recognized by your computer.
Open the Control Panel: Go to the Control Panel on your computer. You can usually access it by searching for “Control Panel” in the Start menu or by right-clicking the Windows icon in the taskbar and selecting “Control Panel” from the menu.
Access the Game Controllers settings: In the Control Panel, look for the “Hardware and Sound” section and click on “View devices and printers.” This will open a new window displaying all connected devices, including your gaming controller.
Select your controller: Locate your gaming controller in the list of devices. It should have a recognizable name or icon associated with it. Right-click on your controller and select “Game controller settings” from the context menu.
Calibrate your controller: In the Game Controllers window, you’ll see a list of connected controllers. Select your gaming controller from the list and click on the “Properties” button below.
Access the calibration settings: A new window will open, showing the properties and settings for your gaming controller. Look for a tab called “Settings” or “Calibrate” and click on it.
Follow the calibration instructions: The calibration process may vary slightly depending on your controller and its manufacturer. Generally, you will be guided through a series of steps to calibrate each axis and button on your controller. Pay close attention to the instructions and follow them accordingly.
Test the calibration: Once you’ve completed the calibration process, you can test your controller to ensure it’s working properly. Move the analog sticks, press the buttons, and check if the input is being registered accurately on the calibration screen. If everything looks good, you can close the calibration window.
Save the calibration settings: Some controllers allow you to save the calibration settings directly within the Control Panel. Look for a “Save” or “Apply” button to ensure that the calibration settings are saved for future use.
Read Also: How to Improve Gaming Performance on Linux
How to Calibrate Your Gaming Controller via Steam
Here’s a quick guide on how to calibrate your gaming controller via Steam:
Launch Steam: Make sure you have the Steam client installed on your computer and open it.
Enable Big Picture Mode: Click on the “View” menu at the top left corner of the Steam window and select “Big Picture Mode.” This mode is designed for better controller support and configuration.
Access Controller Settings: Once in Big Picture Mode, navigate to the “Library” section and select “Controller Configuration.” This will open the controller settings for Steam.
Select Your Controller: If you have multiple controllers connected to your computer, choose the one you want to calibrate from the list of detected controllers.
Choose Configuration: On the controller settings page, you’ll see various options. Look for the “Calibrate” or “Calibration” option and select it.
Follow On-Screen Instructions: Steam will guide you through the calibration process with on-screen instructions. Typically, you’ll be asked to perform specific actions on your controller, such as moving the analog sticks, pressing buttons, or applying pressure on the triggers. Follow these instructions carefully.
Test Calibration: After completing the calibration process, Steam may provide a visual representation of your controller input to check if it’s working correctly. Make sure all the inputs are registering accurately. If not, you can repeat the calibration process or adjust the sensitivity settings.
Save and Apply: Once you are satisfied with the calibration, save the settings and apply them. You can also customize additional controller configurations like button mapping, sensitivity, or creating profiles specific to different games.
Exit Big Picture Mode: To return to the regular Steam interface, press the Steam button on your controller or select the “Exit” option from the top left corner.
Read Also: How to Disable Xbox Game Bar on Windows 11
How to Reset Controller Calibration to Default Settings on Windows
Here’s a quick guide on how to reset controller calibration to default settings on Windows:
Open the Control Panel: Go to the Start menu and search for “Control Panel.” Click on the search result to open the Control Panel.
Access the Devices and Printers Section: In the Control Panel window, look for the “Devices and Printers” option and click on it. This will open a new window displaying all the connected devices on your computer.
Locate Your Controller: Look for your gaming controller in the list of devices. It should be listed under the “Devices” section with its respective name or model.
Open Controller Properties: Right-click on your controller’s icon and select “Properties” from the context menu. This will open the properties window for your controller.
Navigate to the Settings Tab: In the properties window, locate the “Settings” tab. It should be the last tab or one of the tabs near the end.
Reset Calibration: Within the Settings tab, you should find an option to reset the calibration or restore default settings for your controller. This option may be labeled as “Reset to Default” or “Restore Defaults.” Click on this button or option.
Confirm Reset: A confirmation dialog may appear asking if you want to proceed with the reset. Confirm the action by clicking “Yes” or “OK.”
Close Properties Window: After resetting the calibration, close the properties window for your controller.
Restart Your Computer: To ensure that the changes take effect, it’s recommended to restart your computer.
After restarting your computers, your controller’s calibration should be reset to the default settings. You can now use the controller as usual. Keep in mind that this process may vary slightly depending on the specific controller model or software you are using.
Troubleshooting Common Controller Issues
Even with proper testing and calibration, issues with gaming controllers may still arise. Here are some common problems and their possible solutions.
Controller Not Recognized
- If your controller is not recognized by your Windows PC, try the following steps:
- Ensure that the controller is properly connected to the USB port.
- Disconnect and reconnect the controller, trying a different USB port if available.
- Restart your computer and try connecting the controller again.
- Install the latest drivers and software provided by the controller manufacturer.
Input Lag or Delay
If you experience input lag or delay between your controller and the game, consider the following:
- Make sure your controller is connected directly to the USB port on your PC and not through a hub or extension cable.
- Update your controller’s drivers and firmware to the latest version.
- Close any unnecessary background programs that may be using system resources.
- Adjust the USB power settings to ensure that your USB ports are providing sufficient power to the controller.
Read Also: How to Increase Downloading Speed in Xbox App for Windows 11
Final Words
While most PC gaming controllers are plug-and-play, you may need to calibrate them on sometimes to improve accuracy or address minor issues. The good thing is that testing and calibrating your gaming controller on Windows can be done quickly and easily.
FAQs
Can I calibrate my gaming controller on consoles like Xbox or PlayStation?
Yes, Xbox and PlayStation consoles also provide options for testing and calibrating gaming controllers.
Can I use the calibration settings to connect multiple controllers to my Windows PC?
Yes, you can use the calibration settings to connect and configure multiple gaming controllers on your Windows PC. Each controller will have its own settings and calibration options, allowing you to customize them individually.
Is it possible to calibrate a wireless gaming controller?
Yes, wireless gaming controllers can also be calibrated. However, keep in mind that the calibration process may differ slightly depending on the wireless controller model and the software or drivers provided by the manufacturer.
Can I revert the calibration settings back to default?
Yes, most controller calibration settings allow you to revert to the default or factory settings. Look for an option to reset or restore default settings within the calibration or settings menu of your controller.
Does controller calibration improve my gaming performance?
Controller calibration can enhance your gaming performance by ensuring accurate inputs, reducing input lag, and allowing you to customize settings to match your preferences.
Can I use controller calibration to fix button responsiveness issues?
Yes, controller calibration can help address button responsiveness issues. By adjusting sensitivity settings and dead zones, you can fine-tune the controller’s behavior and ensure that buttons are registering inputs accurately and promptly.
Can I calibrate a controller while a game is running?
In most cases, it is recommended to exit any running games before calibrating your controller. This ensures that the changes you make in the calibration settings are applied correctly and take effect when you launch the game again.

